Ruleset
- Overview
- Add a new ruleset
- View and edit ruleset
- Ruleset YAML editor
- Ruleset block templating
- Clone a ruleset
- Delete ruleset
- Seed Files
Overview
Masking rulesets are YAML-based instructions that describe how the tables in your database will be masked. Each masking run applies a single ruleset to a single database connection. However, the same ruleset can be applied to many databases by performing multiple masking runs.
For a brief introduction to the YAML syntax that is used to write rulesets, see: https://learnxinyminutes.com/docs/yaml/.
See the Ruleset YAML Specification guide for a complete reference on the instructions available for writing rulesets.
Add a new ruleset
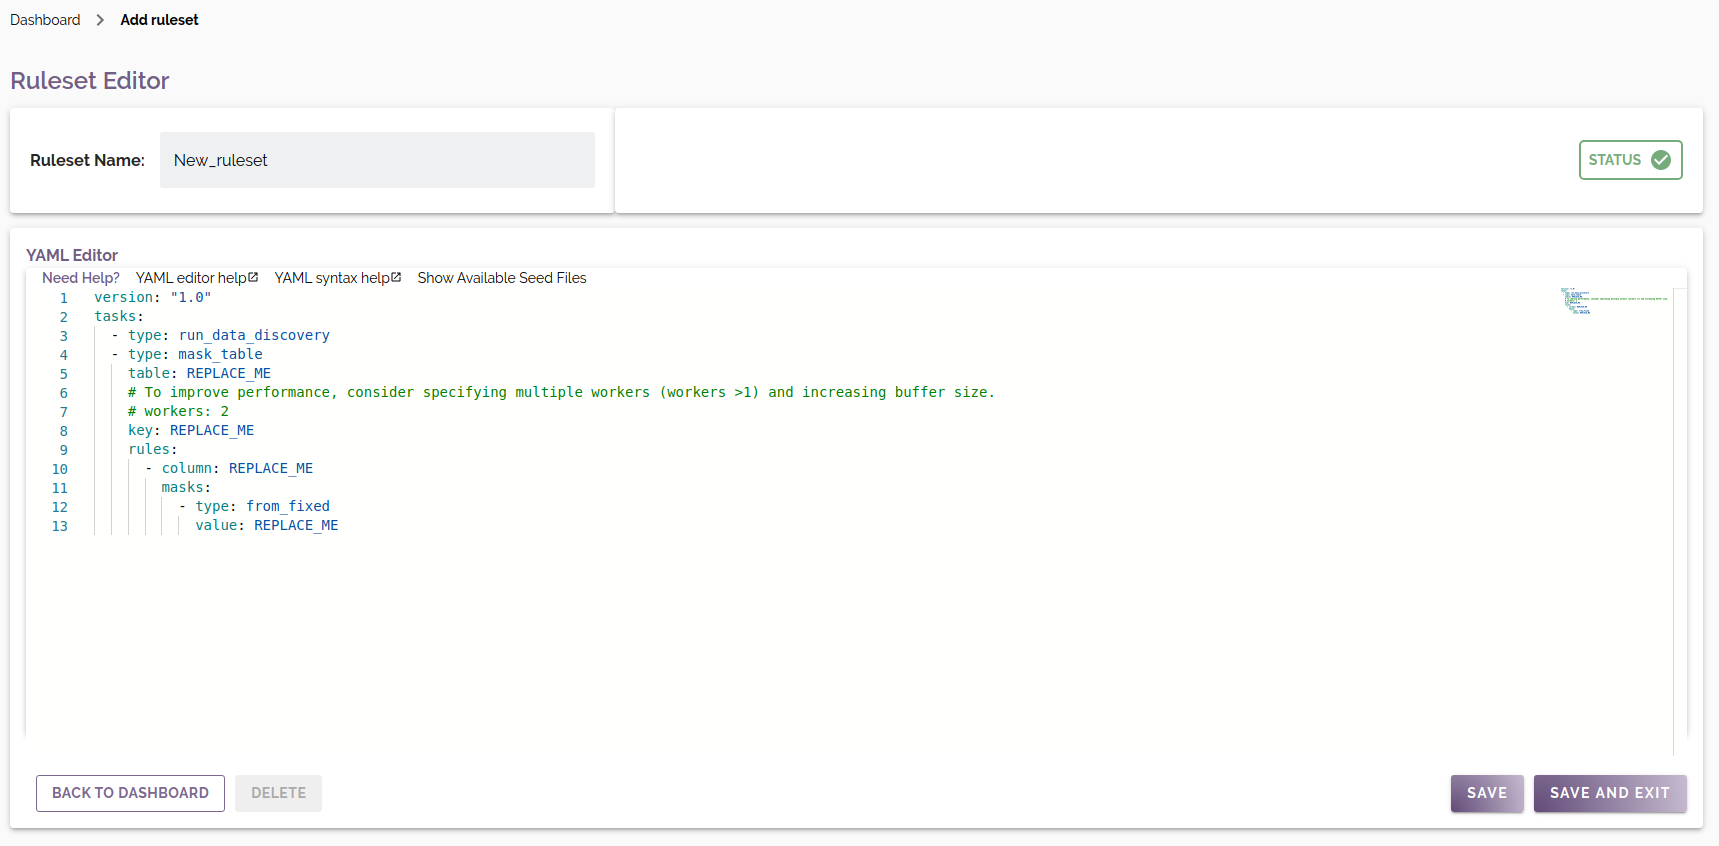
To add a ruleset, click on the ![]() button on the
Rulesets panel of the Database Masking Dashboard. The ruleset YAML editor will be opened and initialised with a
placeholder ruleset for you to extend.
button on the
Rulesets panel of the Database Masking Dashboard. The ruleset YAML editor will be opened and initialised with a
placeholder ruleset for you to extend.
Develop your ruleset in the YAML editor and click the SAVE AND EXIT button when you are finished. Refer to the Ruleset YAML Specification for more information on the available functionality and syntax.
View and edit ruleset
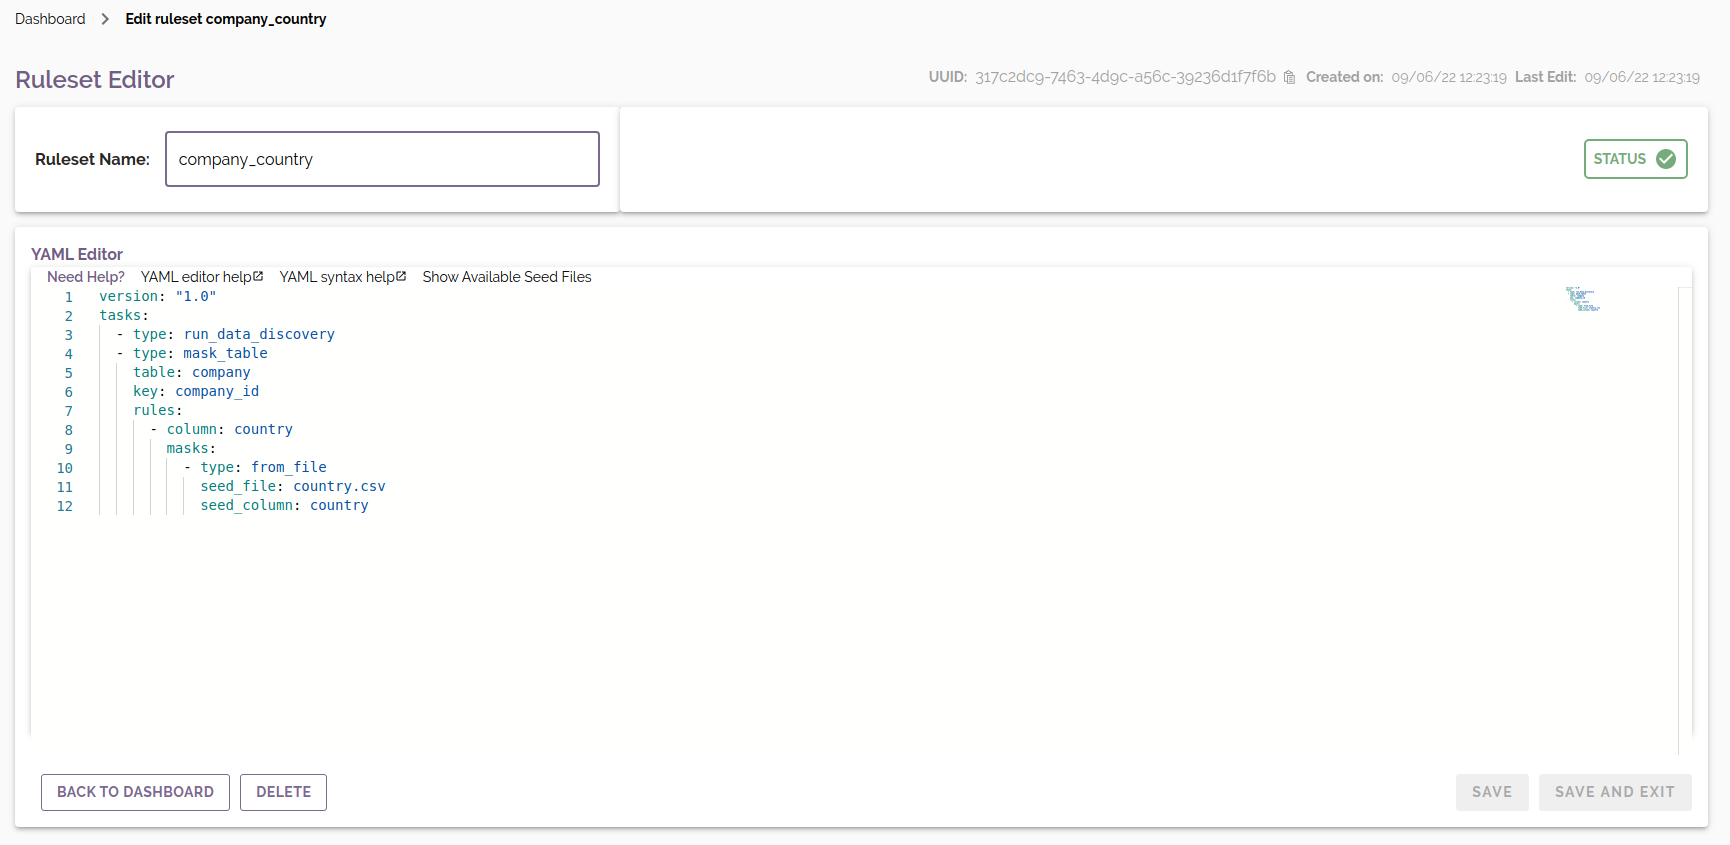
To edit a ruleset, click the edit (![]() ) button for the
ruleset you wish to edit in the Rulesets panel of the Database Masking Dashboard.
The ruleset YAML editor will be opened for editing.
) button for the
ruleset you wish to edit in the Rulesets panel of the Database Masking Dashboard.
The ruleset YAML editor will be opened for editing.
Validation errors may be shown as described in Schema validation. These must be corrected before the ruleset is saved.
Once you have modified the ruleset, click the SAVE AND EXIT button.
Ruleset YAML editor
The ruleset editor is based on the same text editor underlying Microsoft's Visual Studio Code and includes much of the same functionality. The ruleset editor comes with advanced editing features including real-time ruleset validation and auto-completion.
Ruleset YAML editor shortcuts
As our Ruleset editor is based on Visual Studio code, there are a number of helpful shortcuts that can be used within our Ruleset editor.
Windows and Linux
The shortcuts detailed here apply to both Windows and Linux.
- Shift + Tab: De-indents the current line, or any selected content.
- Ctrl + ] / Ctrl + [: Indent/de-indent the current line.
- CTRL + /: Convert the current line into a comment, or any currently highlighted text.
- Ctrl + F: Find all instances of the selected text.
- Ctrl + H: Replace all instances of the selected text.
- Ctrl + L: Selects the current line.
- Ctrl + Shift + L: Selects all occurrences of the current selected content. If changes are made while selecting, this will affect all instances that match.
- Ctrl + F2: Select all occurrences of the current word. If changes are made while selecting, this will affect all instances that match.
- Ctrl + Space: Auto suggest a parameter to fill the current word.
- Ctrl + Shift + [: Folds the current uncollapsed code block.
- Ctrl + Shift + ]: Unfolds the current code block if it is collapsed.
Mac OS
The following shortcuts can be used on a Mac operating system.
- Shift + Tab: De-indents the current line, or any selected content.
- ⌘ + Fn + ] / ⌘ + Fn + [: Indent/de-indent the current line.
- ⌘ + /: Convert the current line into a comment, or any currently highlighted text.
- ⌘ + F: Find all instances of the selected text.
- ⌘ + L: Selects the current line.
- Ctrl + Space: Auto suggest a parameter to fill the current word.
- ⌥ + ⌘ + [: Folds the current uncollapsed code block.
- ⌥ + ⌘ + ]: Unfolds the current code block if it is collapsed.
Command Palette
The ruleset editor's Command Palette can be displayed by pressing F1 or right-clicking on the editor and selecting
the Command Palette option.
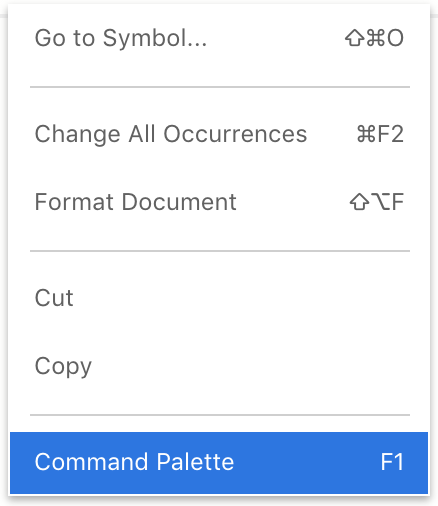

Please refer to https://code.visualstudio.com/docs/editor/codebasics for more information
about how to use each of the features in the Command Palette.
Viewing all tasks in a ruleset
In order to view all tasks being performed in a ruleset follow these steps.
- Collapse all code blocks. This can be done by folding all code blocks, with either
Ctrl + K + 0on Windows or Linux, or ⌘ +K+0on MacOS. - Once the ruleset has been completely folded, expand the
tasksblock by clicking on the>beside it in the editor to show all tasks being performed by the ruleset. - Unfold the entire ruleset again with
Ctrl + K + Jon Windows or Linux, or ⌘ +K+Jon MacOS.
Schema validation
The ruleset editor performs schema-based validation of the ruleset as you type. Errors in your ruleset are highlighted with red squiggle underlines. Hover over the error with your mouse to view the error details. If there are any errors within the YAML the "STATUS" box at the top right of the page will be red, if there are no errors the "STATUS" will be green.
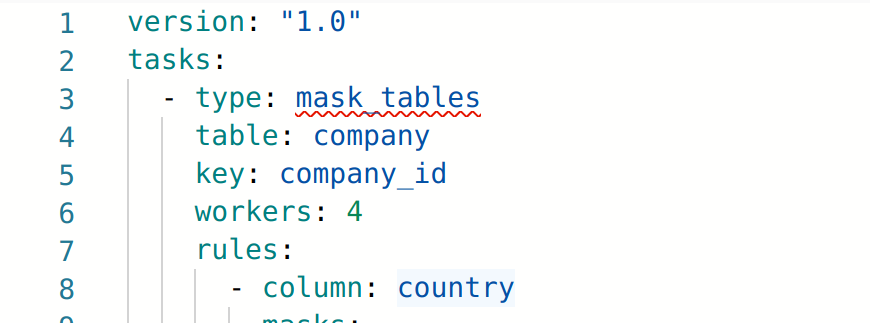

The validation detects configuration errors, such as when:
- A required property has not been provided
- An invalid property name has been provided
- The value of a property is invalid
Hovers
Hover over a ruleset property in the editor to quickly view documentation for that property.
Autocomplete
For properties and values for YAML data, the editor will offer autocomplete suggestions as you type. A dropdown
menu of options will be automatically displayed for fields with value enumeration, such as the task type property,
mask type property, and transform_case transform property:

You can also manually trigger autocomplete suggestions using the 'Trigger Suggestions' command (⌃Space or Ctrl +
Space). This can be used to provide contextual property name suggestions in case you have forgotten the specific name
for a certain property. Suggestions will vary based on indentation level of the cursor (and therefore context).


Formatting
The YAML document can be auto-formatted using ⇧⌥F for macOS or Shift + Alt + F on Linux and Windows.
Folding
You can fold / collapse blocks of YAML using the folding icons in the gutter between line numbers and line start. Code folding may be useful to reduce visual clutter when creating complex or deeply nested YAML structures.
YAML with Comments
YAML supports single line comments. To quickly comment a block, select the YAML block,
and use CTRL + / on Linux and Windows and ⌘ + / for macOS.
Ruleset Block Templating
DataMasque allows you to generate reusable YAML blocks, using a CSV file to fill in the values for variables declared inside braces. To access the Templating tool, click the Start Templating button located in the Helper panel.
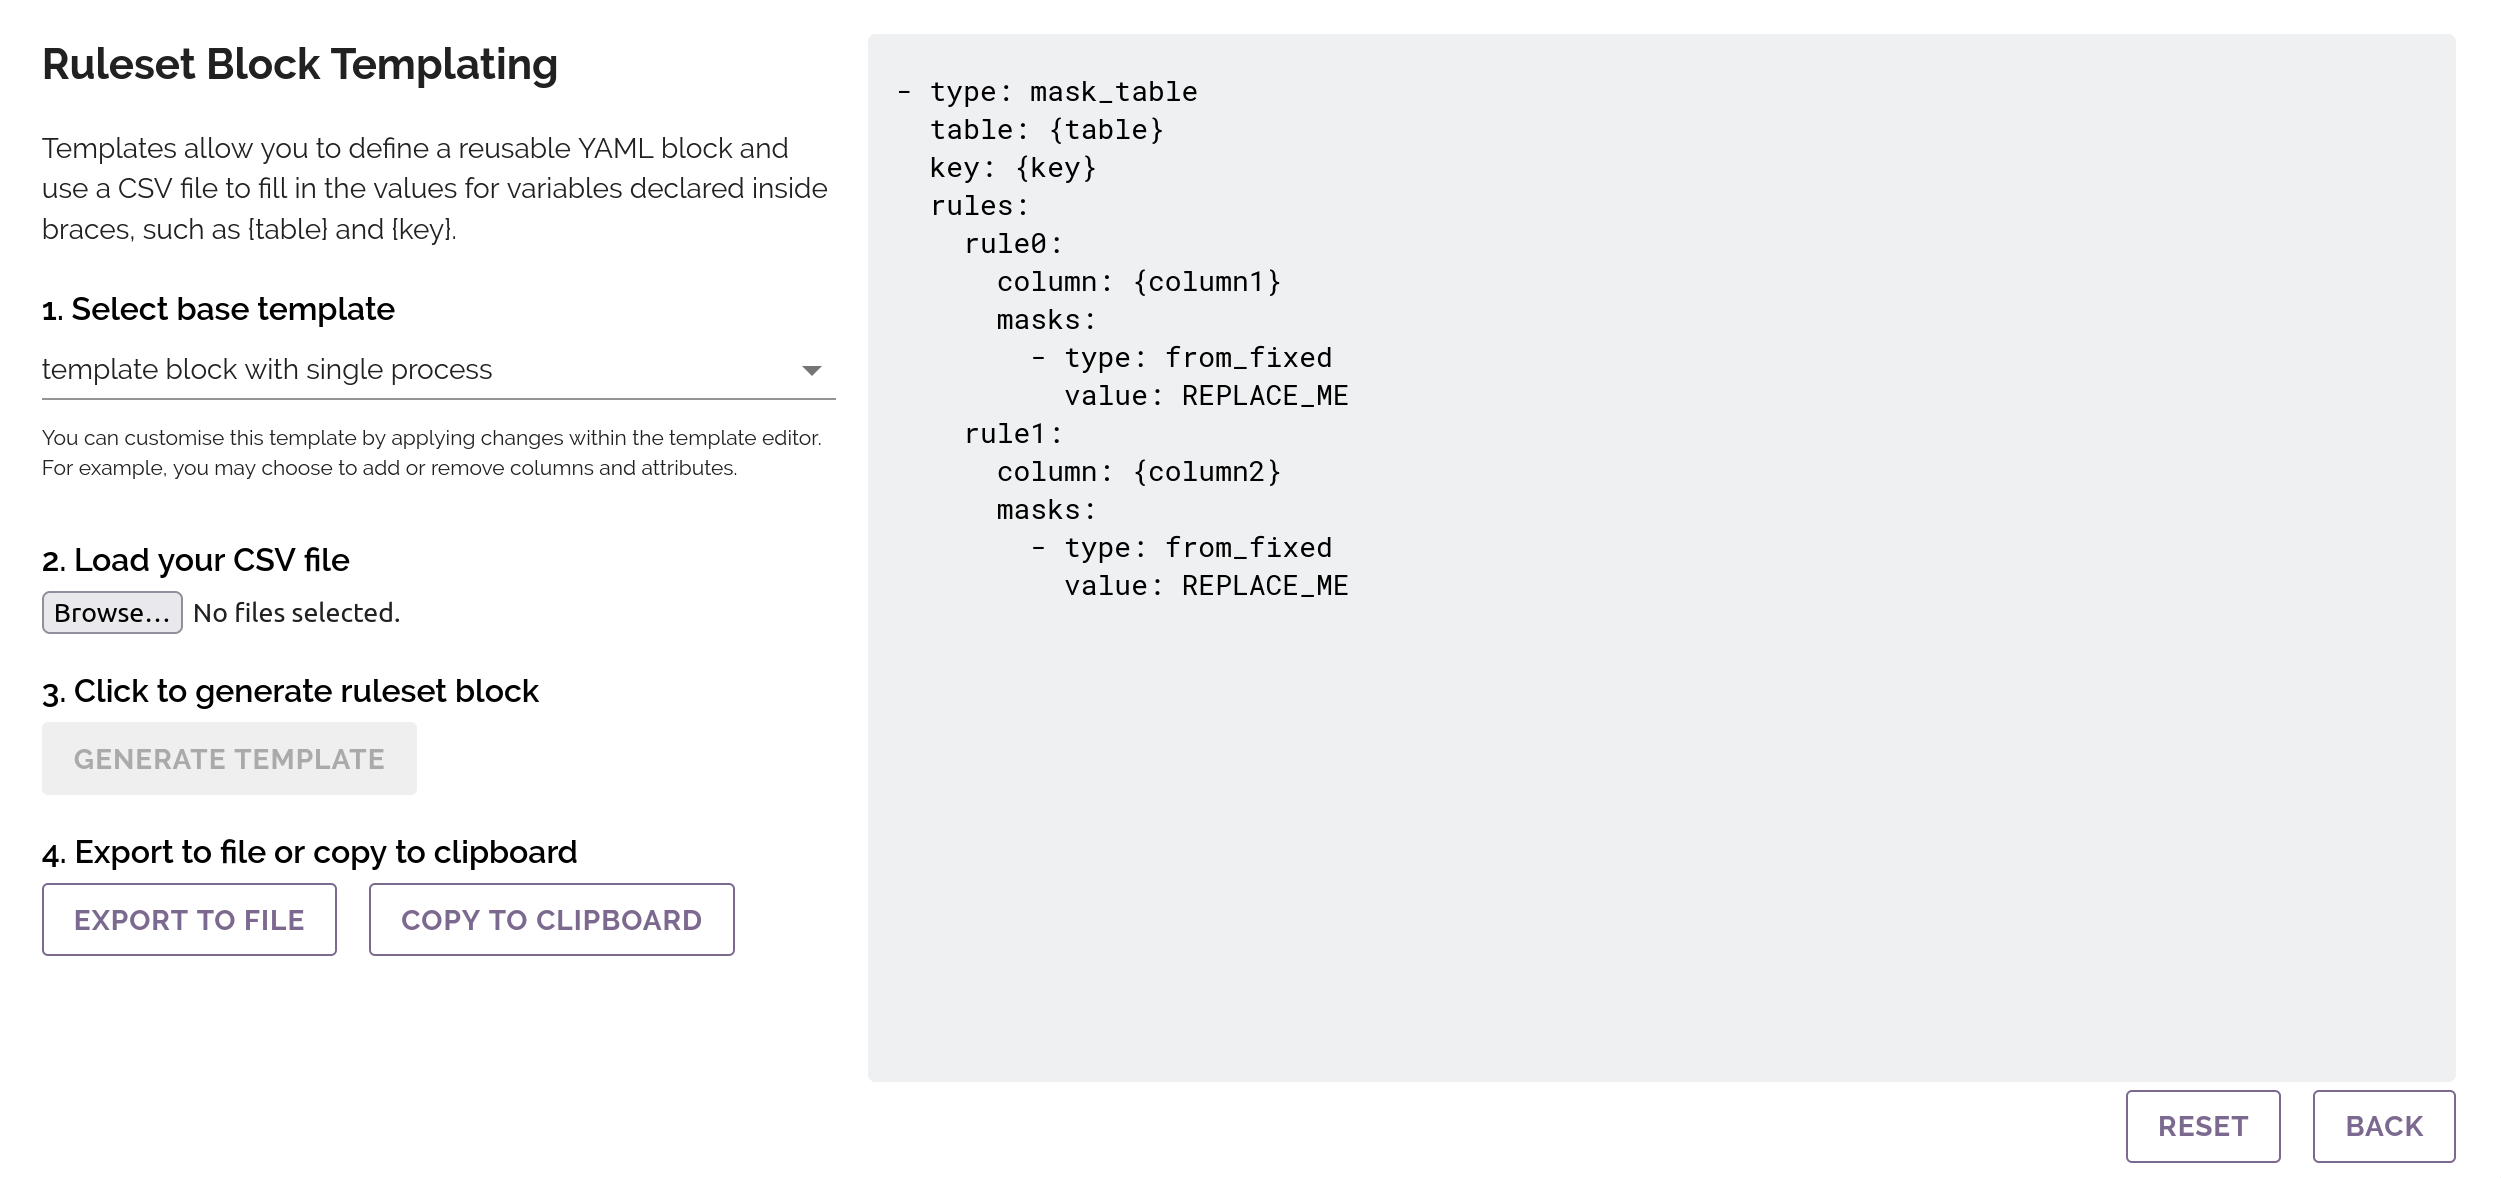
Generating a YAML block with a base template
For this example, we will use the template block with single process.
The values present in the base template are table, key, column1 and column2.
With this example, we can provide a CSV with the following values:
table,key,column1,column2
books,id,title,author
films,id,name,director
Once you have uploaded your csv file, the GENERATE TEMPLATE button should become active. Clicking this button will generate a yaml block using the values uploaded.
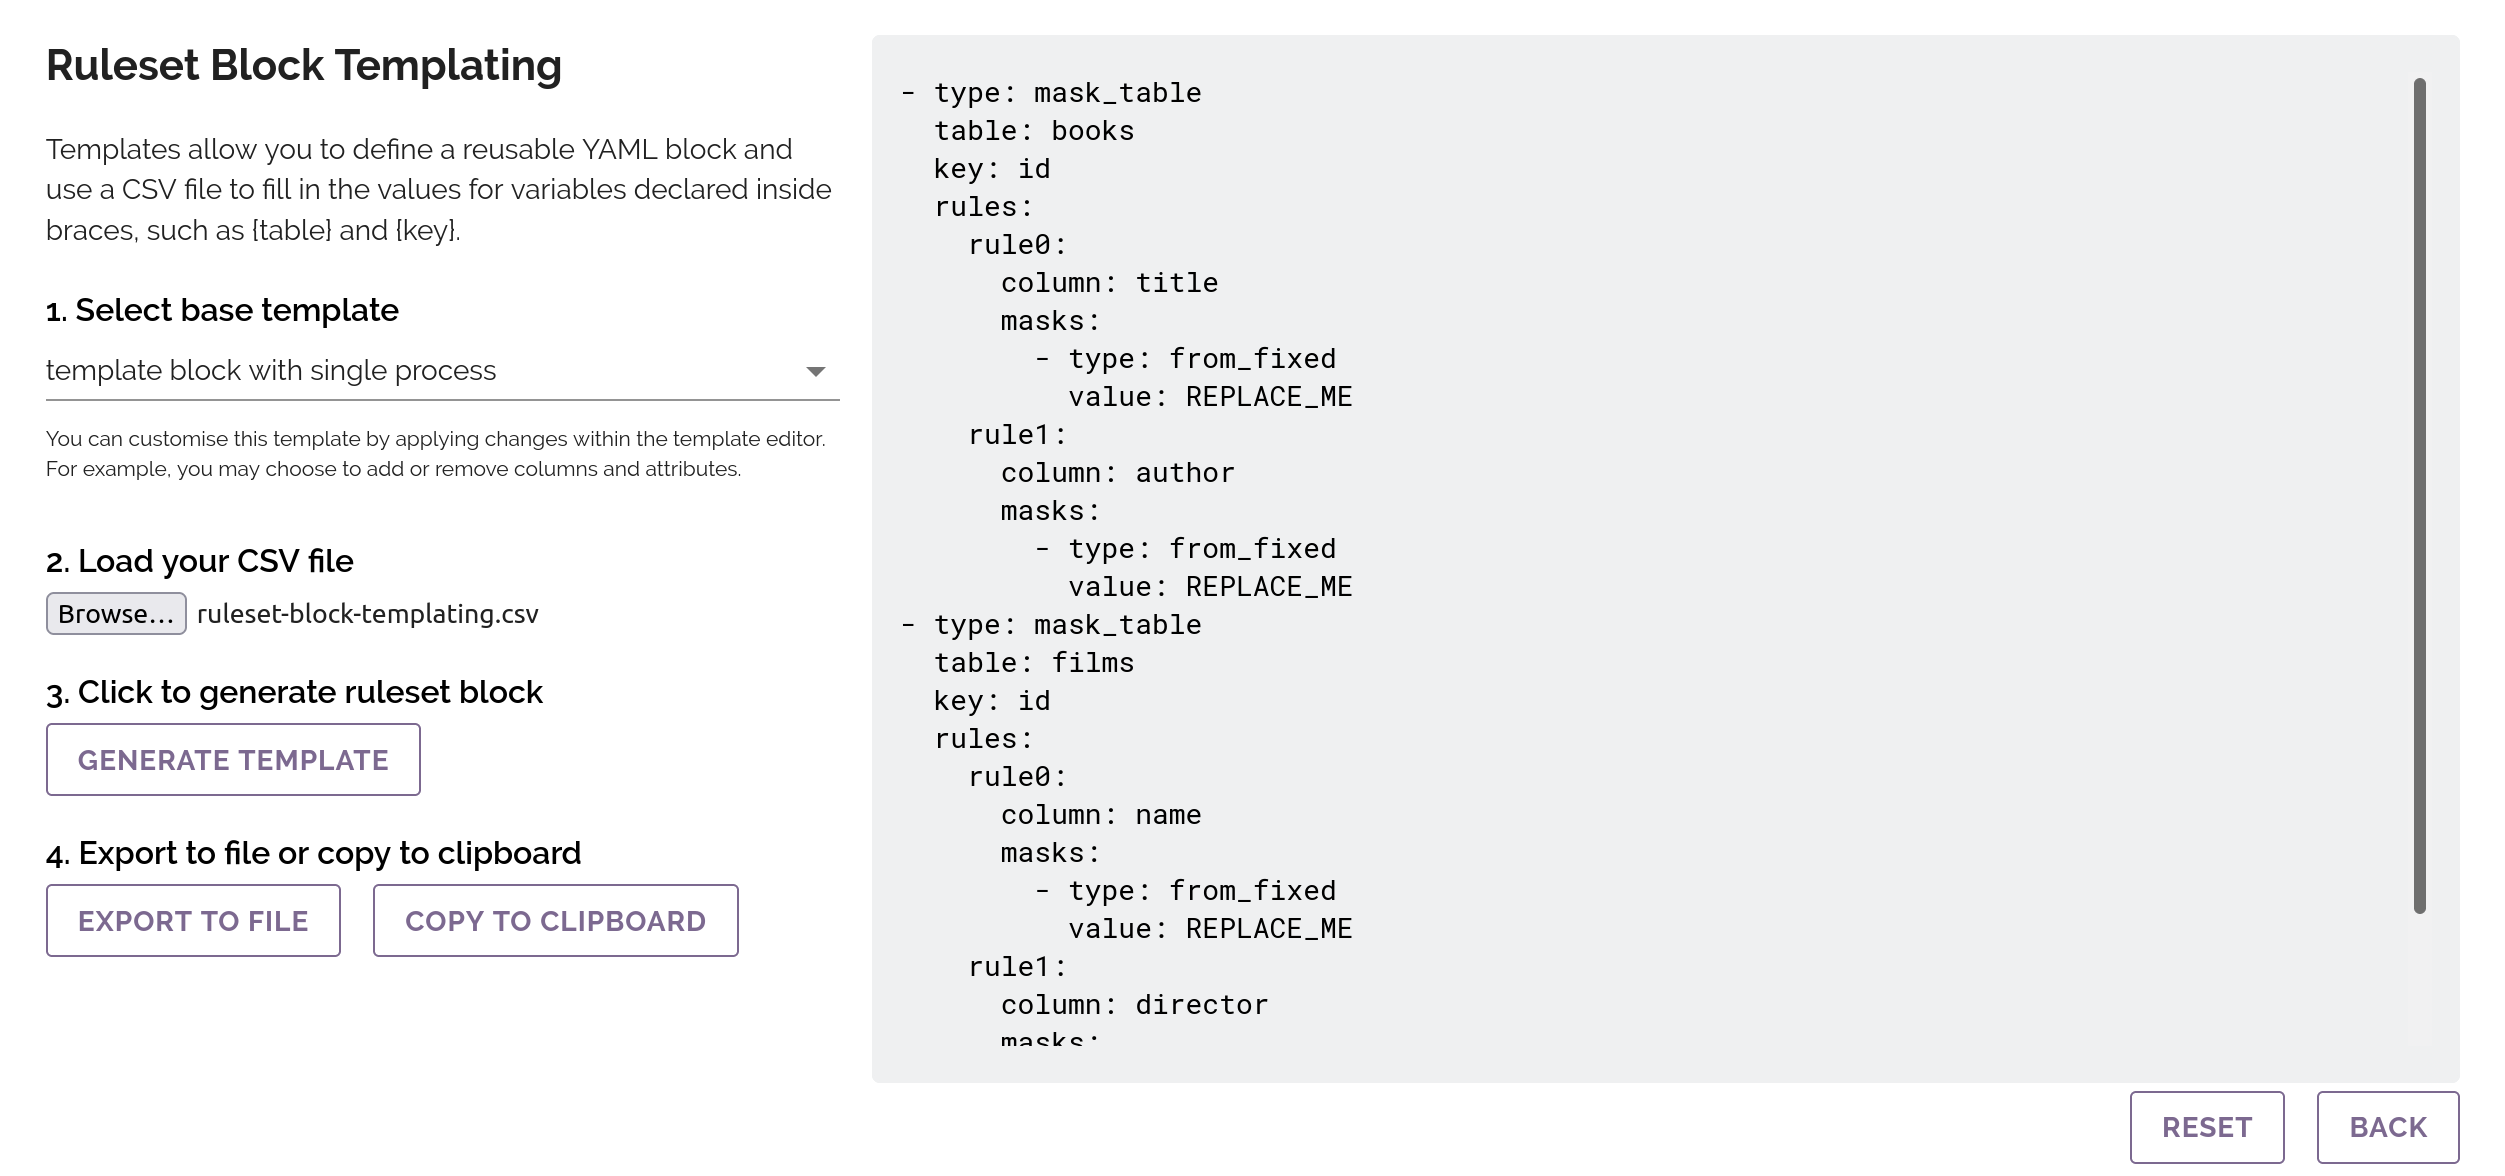
This example will produce the following output.
version: '1.0'
tasks:
  - type: mask_table
    table: books
    key: id
    rules:
      rule0:
        column: title
        masks:
          - type: from_fixed
            value: REPLACE_ME
      rule1:
        column: author
        masks:
          - type: from_fixed
            value: REPLACE_ME
  - type: mask_table
    table: films
    key: id
    rules:
      rule0:
        column: name
        masks:
          - type: from_fixed
            value: REPLACE_ME
      rule1:
        column: director
        masks:
          - type: from_fixed
            value: REPLACE_ME
Once a template has been generated, you can choose to export the output as a .yaml file, or copy the contents of the output to your clipboard. From there, you can paste the output into your ruleset.
Generating a YAML block with a customised template
You may also customise the YAML template, changing areas are to be replaced by values. For example, you may choose to
replace the REPLACE_ME in the base ruleset block with {value1} and {value2}.
version: '1.0'
tasks:
  - type: mask_table
    table: {table}
    key: {key}
    rules:
      rule0:
        column: {column1}
        masks:
          - type: from_fixed
            value: {value1}
      rule1:
        column: {column2}
        masks:
          - type: from_fixed
            value: {value2}
As we have added {value1} and {value2} to the template, our CSV file must now also include a value column.
table,key,column1,value1,column2,value2
books,id,title,book title,author,book author
films,id,name,film name,director,film director
Generating a template will now produce the following output.
version: '1.0'
tasks:
  - type: mask_table
    table: books
    key: id
    rules:
      rule0:
        column: title
        masks:
          - type: from_fixed
            value: book title
      rule1:
        column: author
        masks:
          - type: from_fixed
            value: book author
  - type: mask_table
    table: films
    key: id
    rules:
      rule0:
        column: name
        masks:
          - type: from_fixed
            value: film name
      rule1:
        column: director
        masks:
          - type: from_fixed
            value: film director
Resetting a template
Clicking on the RESET button will reset the template to its original state. The default base template will be selected, any uploaded CSV files will be cleared, and the output will be returned to the original state.

Clone a ruleset
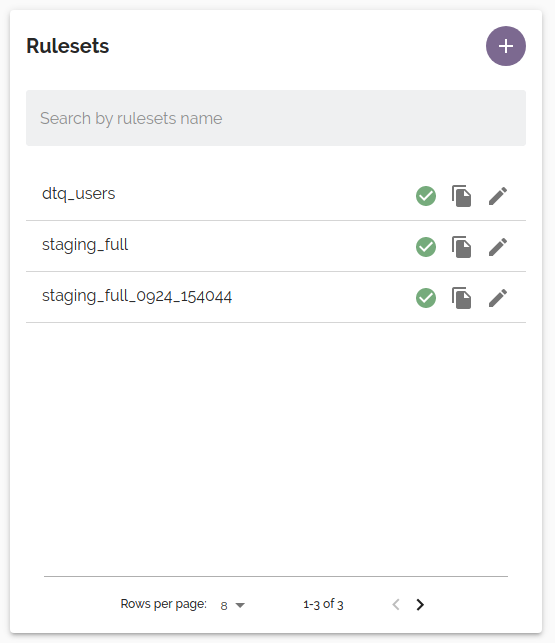
To clone a ruleset, click on the ![]() button
for the ruleset you wish to clone in the Rulesets panel of the Database Masking Dashboard or File Masking Dashboard.
An editable clone of the ruleset will be created with a timestamp appended to the name.
If the ruleset name is longer than 52 characters, it will be truncated during clone
to comply with ruleset name length limit of 64 characters. Rulesets can also be cloned directly from the dashboard.
button
for the ruleset you wish to clone in the Rulesets panel of the Database Masking Dashboard or File Masking Dashboard.
An editable clone of the ruleset will be created with a timestamp appended to the name.
If the ruleset name is longer than 52 characters, it will be truncated during clone
to comply with ruleset name length limit of 64 characters. Rulesets can also be cloned directly from the dashboard.

Delete ruleset
To delete a ruleset, open the ruleset for editing (see View and edit ruleset) and click the Delete button. You will be prompted for confirmation before the ruleset is deleted.
Seed Files
The available seed files can be viewed the by clicking on "Available Seed Files" text above the ruleset editor the first 50 lines of those seed files can be previewed by clicking on the eye icon. The name of a seed file can be copied after selecting the intended seed file and clicking on the clipboard icon.
New seed files can also be uploaded via the "Upload File" button.
JSON Mask Generator
The ruleset generator does not support generating mask rules for JSON or XML data in columns. JSON rules can be generated from an example document by using the JSON Mask Generator. This can be found on the Ruleset Editor page.
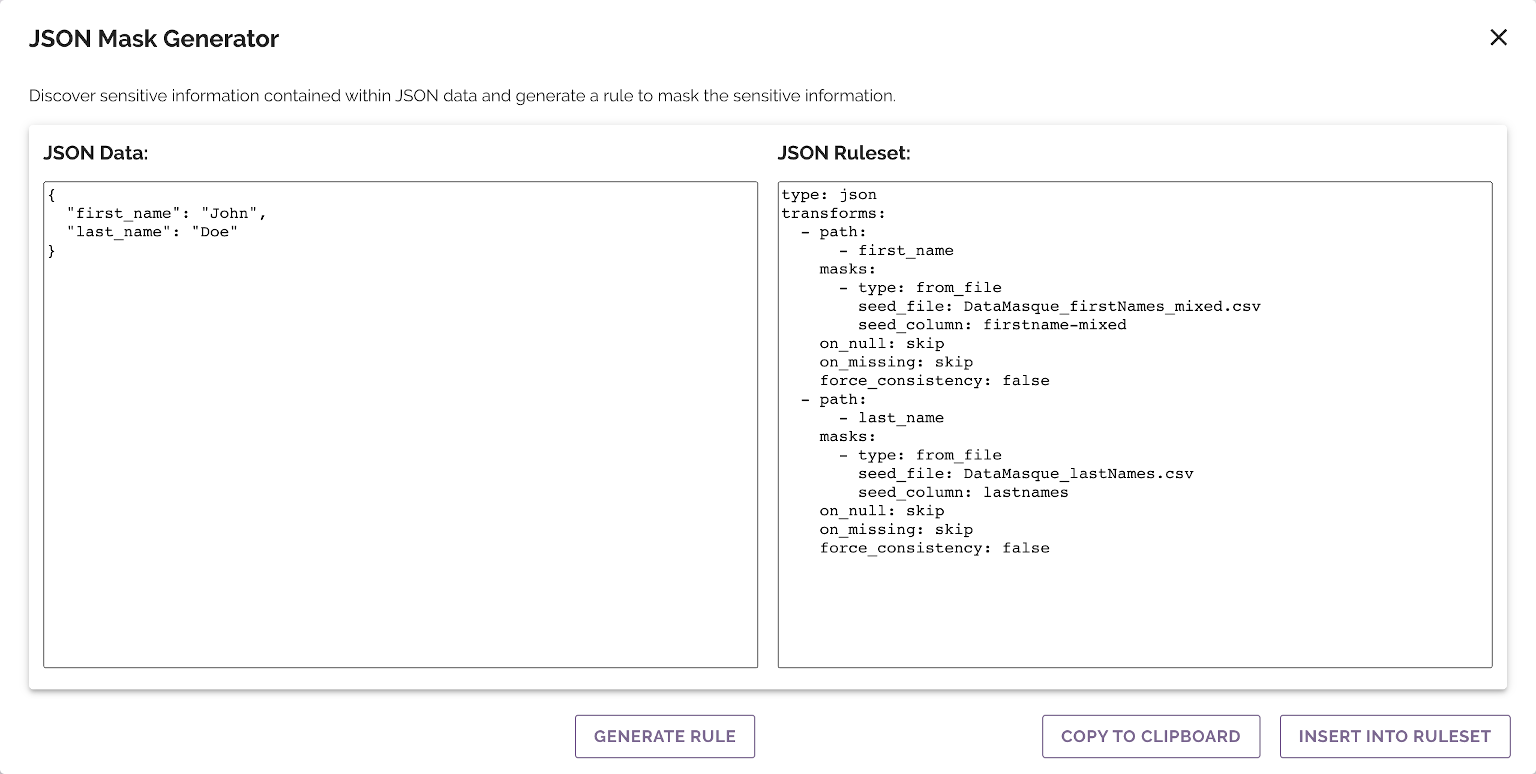
The json mask is generated from fields in an example document that has
been pasted into the JSON Data field.
